Foil Boat Build: Discovery at Home

What you need:

  • Aluminum foil.
  • Scissors.
  • Ruler.
  • Tape.
  • Pen or pencil.
  • Scrap paper.
  • Rag or paper towels.
  • Pennies or other coins.
  • Water.
  • Bucket, tub, sink or dish pan (something to hold the water).

Directions

  1. Cut two squares of aluminum foil, making one square twice the size of the other square. For example: you could make one square 12 inches by 12 inches and make the second square 6 inches by 6 inches.
  2. Fold the two aluminum foil squares into two different boat shapes. Try to make them the same shape. For example, you could make them both have two pointed ends (like canoes) or you could make them square or rectangular (i.e. rectangular prisms).
  3. Make finishing touches to the boats. Make sure they do not have any leaks. If needed, use a little tape to make them stronger. Flatten the bottoms of the boats. On each, try to make sure the rim is the same height going all the way around the edge of the boat.
  4. Now give each boat a super cool name. Example: S.S. Discovery.
  5. Fill the container of your choice with some water, making sure to add enough water to allow the boats to sink.
  6. Take one of the boats and carefully float it in the container of water.
  7. Gently add one penny at a time. To prevent the boat from tipping, carefully balance the load as you add pennies (left to right, front to back ---- or port to starboard, fore to aft, if you are feeling nautical).
  8. Keep adding pennies until the boat finally sinks.
  9. Carefully take out the sunken boat and place it and the pennies on a rag or paper towel. Dump any excess water back into the container.
  10. Count how many pennies the boat could support before sinking. (The penny that sank the boat does not count).
  11. Write the number down so you can reference it later.
  12. Repeat this process with the other boat. Be sure to only add dry pennies because wet pennies will weigh more than dry pennies.
  13. Write down how many pennies could fit in the other boat.
  14. Could the larger boat support more pennies than the smaller one?

How to Expand it

  • Create a chart to compare your boats.
  • Try different types of money. You could use nickels, dimes, quarters, or even international coins if you have some. Try making more boats of different sizes and test those. Will the boats float in liquid or just in water? Try oil or vinegar and see how many pennies it takes to sink your boats.
  • Test other things to see if they sink or float! Check out Sink or Float Science.
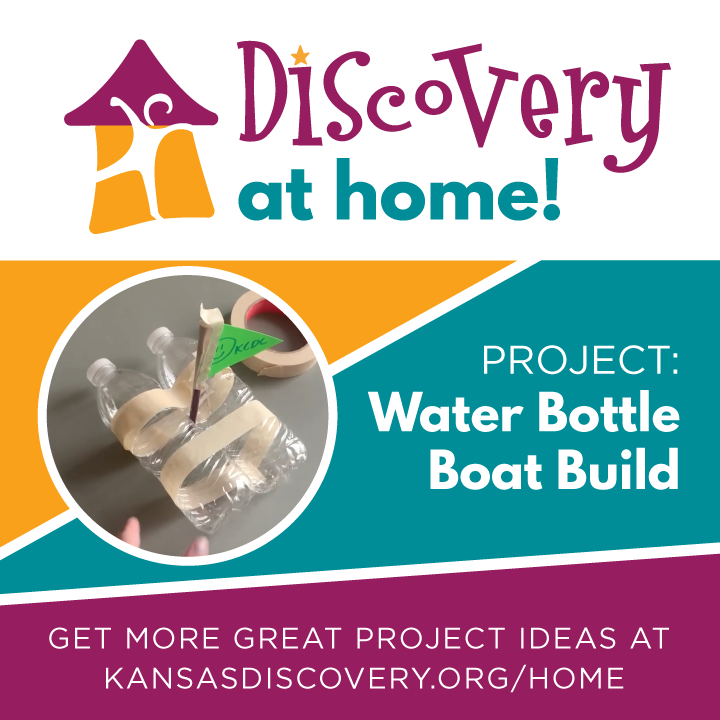
  • Like building boats? Check out Water Bottle Boat Build.

What Kids Learn

  • Density is what determines whether an object sinks or floats in water. If something is less dense than water, it floats. If something is more dense than water, it sinks.
  • Basic engineering skills. Engineers solve problems with constraints, in this case, limited materials and air pressure. They learn to solve problems by using the engineering design process: asking questions, coming up with solutions, building, testing and improving.
  • Fine motor skills. Kids practice using the small muscles in their hands later used for writing.
  • Experimentation! When kids experiment, they're learning how to learn. Failure is an important part of experimenting, so let kids try things that won’t work. It’s how they figure things out!
  • Opposite words, like gooey and sturdy, liquid and solid, warm and cold, big and small, empty and full. Learning to compare things is an important part of learning language.
  • Vocabulary
    • Density: The weight and size of an object. A fluffy pillow has less density than a brick. A crayon has more density than a feather.
    • Buoyancy: the ability or tendency to float in water, air or some other fluid.
    • Hypothesis: a supposition or proposed explanation made on the basis of limited evidence as a starting point for further investigation.
    • Observations: the action or process of observing something or someone carefully in order to gain information.

Light Table: Discovery at Home

What you need:

  • Clear plastic tub.
  • Blanket.
  • Clothespins or other clamps.
  • Flashlight or string of lights.
  • Smaller box, tub or something to raise the lights giving them height.
  • Wax paper or tissue paper.
  • Cookie cutters, see through toys, etc.

Directions:

  1. Place the plastic tub upside down.
  2. Wrap the blanket around the edges of the tub and secure it with the clothespins/clamps so that light would only escape through the top of the tub.
  3. Gather the lights together, put them under the tub so the light structure is trapped inside the tub, but light shines through the base of the top which is the top of the light table.
  4. Gather cookie cutters and toys to play with the light table and determine which materials are transparent, translucent, and opaque!

Ways to expand it:

  • Use mirrors to move the light in different directions.
  • Find materials of different colors that you can see through. Color wax paper or tissue paper with markers. Experiment with mixing colors as the light travels through more than one material.

What kids learn:

  • Experimentation! When kids experiment, they're learning how to learn. Failure is an important part of experimenting, so let kids try things that won’t work. It’s how they figure things out!
  • Hand eye coordination. Young children can use activities like light exploration to help improve communication between their minds and bodies.
  • Investigate. Determine the effects of placing objects made of different materials in the path of light beams.
  • Fine motor skills. Kids practice using the small muscles in their hands later used for writing.
  • Vocabulary:
    • Translucent: allows light, not shapes, to pass through.
    • Transparent: allows light through so that shapes behind can be seen.
    • Opaque: does not allow light to be seen through.

Geodesic Dome: Discovery at Home

What you need:

  • 30+ pieces of paper (index cards, construction, computer, newspaper).
  • Tape.

Directions:

  • Make sure your papers are all the same size.
  • Roll and tape paper into cylinders that are all the same size.
  • Create triangles with the cylinders you created.
  • Tape all the edges so the triangles stay together.
  • Now it’s time to build a 3D structure with your triangles!
  • Tape edges of your triangles together and create.

Ways to expand:

  • This concept could be used during fort building. Do you have materials that are large enough to create a geodesic dome and then turn it into a fort? If you like building forts, you might enjoy our fort building 101 video!
  • Use the triangle concept and create triangles out of cardboard to make a life-size structure. Can you make structure that your whole family can enter?

What Kids Learn:

  • Basic engineering skills. They learn to solve problems by using the engineering design process: asking questions, coming up with solutions, building, testing and improving.
  • Spatial or visual thinking. Being able to imagine the positions of objects and how they interact is an important skill for learning to navigate the world and later, learn math and language.
  • Fine motor skills. Kids practice using the small muscles in their hands later used for writing.
  • Experimentation! When kids experiment, they're learning how to learn. Failure is an important part of experimenting, so let kids try things that won’t work. It’s how they figure things out!
  • Hand eye coordination. Young children can use activities like fishing to help improve communication between their minds and bodies.
  • Vocabulary:
    • Vertices: corner or point on a structure.
    • Convex structure: all of the shape’s vertices point outwards.
    • Geodesic dome: hemispherical structure that is thin and based on a convex structure made from triangles.
    • Hemispherical: half of a sphere
    • Constraint: a limitation or restriction. Materials, time, and space are common constraints. Real engineers have to work around constraints all the time!

Roller Coaster Science with Worlds of Fun!

Today from Discovery at Home: Join us live with Chris Foshee from Worlds of Fun for a Q&A about the science of roller coasters! Tune in on Tuesday, April 7 at 10 a.m. for serious fun with Chris and engineer Caitlin Luttjohann, Director of STEAM Education at the Discovery Center. Learn about how roller coasters are made, operated and maintained.


Inertia Cup Trick: Discovery at Home

Supplies:

  • Large plastic cup
  • Another object smaller and heavier than the cup, we used a plastic seasoning bottle
  • Cardboard sheet

Directions:

  1. Set the plastic cup on the table.
  2. Place the cardboard sheet centered on top of the plastic cup.
  3. Place the seasonings bottle on top of the cardboard sheet. Make sure it is lined up with the cup so that it would fall into the cup if you removed the cardboard sheet.
  4. With one hand, hold the plastic cup.
  5. With your other hand, hit the cardboard so it clears the seasonings bottle and cup and flies away. (Be sure not to hit the seasonings bottle or cup with your hand).
  6. The seasoning bottle should fall into the plastic thanks to the inertia you created.
  7. It might take more than one try, so keep experimenting!

Ways to expand it

  • Make it more difficult! Try multiple materials on top of the cardboard. Try materials that are different weights and compare the differences.
  • Where else can you try this interia trick? With a tablecloth and place setting! Put down a thin piece of cloth or tablecloth on your table. Set your table using plastic pieces. Then, try to remove the tablecloth without the table settings moving!

What kids learn:

  • Basic engineering skills. Engineers solve problems with constraints. They learn to solve problems by using the engineering design process: asking questions, coming up with solutions, building, testing and improving.
  • Spatial or visual thinking. Being able to imagine the positions of objects and how they interact is an important skill for learning to navigate the world as a child and in the future.
  • Experimentation! When kids experiment, they're learning how to learn. Failure is an important part of experimenting, so it is valuable to let kids try things that won’t work. It’s how they figure things out!
  • Hand eye coordination. Young children can also use activities like fishing to help improve communication between their minds and bodies.
  • Interactions between materials. The materials have different textures. It takes a different amount of force to remove the friction between the materials.

Vocabulary:

  • Constraint: a limitation or restriction. Materials, time, and space are common constraints. Real engineers have to work around constraints all the time!
  • Force: energy caused by a push or a pull, in this case, the pull created by gravity and other supports on the roof of your fort!
  • Newton’s First Law of Motion: Every object will continue moving at the same speed or remain still unless something makes it change.
  • Inertia: The resistance of an object to change its motion or direction.
  • Friction: A force acting in the opposite direction. When two things rub together they cause friction.

Water Bottle Boats: Discovery at Home

Materials Needed:

  • Two empty plastic bottles
  • Paper
  • Markers
  • Crayons
  • Tape 
  • Scissors
  • Bathtub for testing or bucket with water
  • optional : crayons, lids, glue, popsicle sticks 

Directions:

  • Attach two water bottles together with some tape.
  • Add a sail to your boat by using a pencil or popsicle stick in the middle of the two water bottles. 
  • Add the flag by cutting a triangle out of a piece of paper and attach it to the top of your pencil.  
  • Decorate your boat! You can use markers and crayons to add designs. Cut paper and tape/glue it to the boat.
  • Once decorated, test your boat in water to see if it floats or sinks. Add more or less to your boat to see if this makes a difference. 
  • While your boat is floating, try adding an object on your boat to see if it can hold it. How many toys can it hold before sinking?

How to Expand it:

  • Put other objects in the water. What floats? What sinks? What’s the difference?
  • Move your boat from one side of your tub to the other without touching it.
  • Redesign your boat and test out different designs. Will one water bottle work? What other objects can you use to build a boat


What do kids learn?

  • Density is what decides whether an object sinks or floats in water. If something is less dense than water, it floats. If something is more dense than water, it sinks.
  • Using plastic bottles to make toys is a great way to encourage imagination and reuse of single-use products.
  • Science Vocabulary:
    • Density - The weight and size of an object. A fluffy pillow has less density than a brick. A crayon has more density than a feather.
    • Sail - a piece of material extended on a mast to catch the wind and propel a boat. Real sailboats rely on the power of wind to travel.


Stomp Rockets: Discovery at Home

Materials Needed:

  • Paper
  • Tape
  • Scissors
  • Plastic bottle

Directions:

  • Cut the paper in half (width/hamburger style). Roll and tape one half of the paper into a cylinder that will fit onto the spout of the bottle.
  • Cut the other half of the paper in half again.
  • With one piece, create a cone shape that will trap air. Tape the cone to an open end of the cylinder.
  • Use the last piece of paper to create right triangles to use as fins. Fins can help with the rocket direction.
  • Place your rocket on the mouth of the bottle, and give your bottle a quick squeeze with your hands or stomp with your foot to launch!

How to Expand It

  • Create a target and work to design a rocket that can hit it!
  • Hold a family competition to see whose rocket can fly the furthest, or the highest.
  • Try the activity both indoors and outdoors, and observe differences.

What do kids learn?

  • Basic engineering skills. Engineers solve problems with constraints, in this case, limited materials and air pressure. They learn to solve problems by using the engineering design process: asking questions, coming up with solutions, building, testing and improving.
  • Kids will also explore the power of air as a force as they push air from the bottle to the rocket. When the air is forced out of the bottle, it has less space inside the rocket. The force created pushes the rocket upward.
  • Science Vocabulary
    • Constraint: a limitation or restriction. Materials, time, and space are common constraints. Real engineers have to work around constraints all the time!
    • Air pressure: the weight of air molecules. Air moves from areas of high pressure to areas of low pressure. The same phenomenon that causes your rocket to launch is what causes weather, like wind, tornadoes and hurricanes.


Recycled City: Discovery at Home

Materials Needed:

  • Tape
  • Scissors
  • Glue
  • Markers
  • Empty boxes, bottles, cans, and other recycled materials

Directions:

  • Create a list of what businesses, resources, and services make up a city. Create buildings and structures for each of those things. Your list might include homes, parks, schools, hospitals, fire stations, police stations, movie theaters, restaurants, and more.
  • Create modes of transportation and ways to get from one place to another

How to Expand it:

  • Design a futuristic structure: floating buildings, public transportation, or an energy source like solar panels or wind turbines.
  • Create two different cities, then figure out how to connect the two using an innovative transportation method.
  • Take a walk outside and look at how your neighborhood is built. Ask about why streets are the width they are, the reason for curb cuts in sidewalks and the need for street signs. Get kids thinking about the purpose of infrastructure.

What do kids learn?

  • Basic engineering skills. Engineers solve problems with constraints, in this case, limited materials and space. They learn to solve problems by using the engineering design process: asking questions, coming up with solutions, building, testing and improving.
  • Spatial or visual thinking. Being able to imagine the positions of objects and how they interact is an important skill for learning math. Ask how big the road needs to be for cars, or how many families can live in the apartment building.
  • Symbolic thinking, or the ability to think about one thing representing something else. When small children begin to connect a house on paper to the house they live in, they start building the connections in the brain that allow for reading and learning later.
  • Science Vocabulary
    • Infrastructure: the basic physical and organization of structures, facilities, and resources needed for a community.

Fort Engineering 101: Discovery at Home

Materials Needed:

  • Pillows
  • Fitted and flat sheets
  • Furniture
  • Broom
  • Safety pins, clothespins, chip clips, binder clips
  • Random household objects!

Directions:

  • Use furniture, blankets, and other materials to create a fort to fit the entire family!
  • Pro-level fort engineering tips:
    • Use fitted sheets. They can stretch and hold around chairs and other furniture pretty well.
    • Use heavy objects like soap bottles, books, and rocks to hold down blankets and sheets.
    • The back of the couch is a great place to start. Tuck your sheets there, or use a broom handle behind pillows to create a tall support.
    • Don’t forget forces! A sheet has to have equal forces pulling on it for it to stay in place as your roof.

How to Expand it:

  • Create constraints or challenges to encourage problem-solving. Can you build your fort with fewer materials? Can you make it tall enough for an adult to stand up in?
  • Encourage imagination. Can your fort serve as a veterinary clinic? A jungle hideout? A kitchen?

What do kids learn?

  • They experiment! When kids experiment, they're learning how to learn. Failure is an important part of experimenting, so let kids try things that won’t work. It’s how they figure things out!
  • Basic engineering skills. Engineers solve problems with constraints, in this case, limited materials and space. They learn to solve problems by using the engineering design process: asking questions, coming up with solutions, building, testing and improving.
  • Fort-building is a great lesson in force. Kids tend to spend a lot of time figuring out how to keep their roof from slipping off one side of the fort or the other. If a roof isn’t equally supported on both sides, putting even force on the sheet, it won’t stay put.
  • Spatial or visual thinking. Being able to imagine the positions of objects and how they interact is an important skill for learning math. Asking if the fort is big enough for a grownup to stand up in encourages spatial thinking.
  • Science Vocabulary
    • Force: energy caused by a push or a pull, in this case, the pull created by gravity and other supports on the roof of your fort!
    • Constraint: a limitation or restriction. Materials, time, and space are common constraints. Real engineers have to work around constraints all the time!

Tallest Tower Competition: Discovery at Home

Materials Needed:

  • 10 - 20 Plastic Cups (multiple sizes if possible)
  • Tape measure

Directions:

  • Build the tallest tower possible using only the plastic cups. Make sure it stands for at least 15 seconds!
  • Measure the height and record the number.
  • Start over and build another tower in a different way, trying to make the tower taller.

How to expand it:

  • Add different materials to the challenge. For example, clothes pins, popsicle sticks, silverware, toys, etc. Can you balance a spoon op top of your tower? Can you drape a blanket over it?
  • Try to build your towers on a different floor, move from carpet to hardwood, to tile. Observe the differences!
  • Knock it down! Build a tower as tall as you can, then make a game out of knocking it over.

What do kids learn?

  • Hand eye coordination and fine motor skills, both useful developmental skills for learning, writing, and creating!
  • Basic engineering skills. Engineers solve problems with constraints, in this case, the limited number of cups. The learn to solve problems by using the engineering design process: asking questions, coming up with solutions, building, testing and improving.
  • Math skills. Small children learn about geometric shapes, volume, and mass by feeling three dimensional shapes in their hands and seeing how the shapes interact together. Building a tower and talking about it is a great way to build a foundation for math.
  • Patience and self control. Making the tower taller instead of knocking it over is hard for small children. This is a great test of patience, but knocking it over helps them learn, too!
  • Science vocabulary:
    • Foundation: the bottom, the support on which a structure rests.
    • Center of Mass: the place where most of the weight of an object is concentrated. In a tower, that's the base. Even little kids know the best way to knock over a tower is to go for the bottom! That's using center of mass to solve a problem.
    • Constraints: a limitation or restriction. Real engineers have to work around constraints all the time!