Airplane Engineering: Live Chat with Kim Burton, Textron Aviation

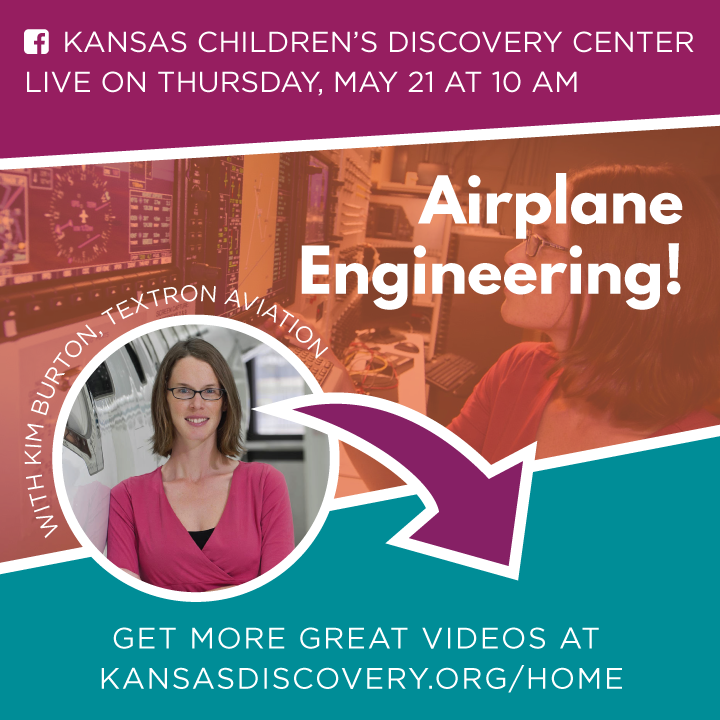
Today from Discovery at Home: Kim Burton, engineer with Textron Aviation, talks about how airplanes are made! Kim is an electrical engineer and pilot who has worked in avionics developing electrical systems for new and existing planes. She currently works as a customer service engineer helping people learn how to use and improve aircraft. Kim loves sharing the world of engineering with kids!

Coin Tower Challenge: Discovery at Home

What you need:

  • Coins of the same size.
  • Thin cardboard (make sure the cardboard is thinner than one of your coins).

Directions:

  1. Stack the coins on top of each other to create a tower.
  2. Use a piece of thin cardboard to remove the coin at the bottom of the tower. Hint: Speed is important.
  3. Remove as many bottom coins from the tower as possible before the tower falls!

Ways to expand:

  • Use different sized coins in the tower. Do the different sized coins make it easier or harder to remove the coins?
  • Create a structure that has multiple towers and/or a more complex structure. Try to remove the bottom coins without the tower falling.

What kids learn:

  • Experimentation! When kids experiment, they're learning how to learn. Failure is an important part of experimenting, so let kids try things that won’t work. It’s how they figure things out!
  • Hand eye coordination. Young children can use activities to help improve communication between their minds and bodies.
  • Basic engineering skills. Engineers solve problems with constraints, in this case, friction and inertia. They learn to solve problems by using the engineering design process: asking questions, coming up with solutions, building, testing and improving.

Vocabulary:

  • Constraint. A limitation or restriction. Materials, time, and space are common constraints. Real engineers have to work around constraints all the time!
  • Force. Energy caused by a push or a pull. In this case, the pull created by gravity and the stack of coins.
  • Newton’s First Law of Motion. Every object will continue moving at the same speed or remain still unless something makes it change.
  • Inertia. The resistance of an object to change its motion or direction.
  • Friction. A force acting in the opposite direction. When two things rub together they cause friction.

Estimation Exploration: Discovery at Home

What you need:

  • Containers full of multiple pieces of the same thing.

Directions:

  1. First, find (or create!) a container that has multiples of the same thing.
  2. Think about how much space each item takes up.
  3. Think about how many pieces you can see.
  4. Estimate how many pieces were in the container.
  5. Count the pieces and see how close you were!
  6. Find another container that has multiples of the same thing, and estimate again!

How to expand it:

  • Think about how long it would take to get from one room in your house to another room. Think about walking vs running. Decide if you will walk, run, roll, skip, etc., and then estimate the time it takes to get from the starting point to a destination in your house. Have a grownup keep track of the time it takes.
  • Think about a chore, like making the bed. What steps do you have to take to make the bed? How long do each of those steps take? How long would it take to go through all the steps in making the bed? Estimate your time, then have your grownup keep track of the time it takes you to complete the task.

What kids learn:

  • Practicing estimation skills is important, because those skills are often used in daily life. For example, when people go grocery shopping, they have a budget to follow. They estimate how much each item costs as it is placed in the cart.
  • Be able to determine if an answer is reasonable. For example, if a child is asked to multiply 76 x 132 and they answer 732,494. We want them to question that answer and determine that they should have an answer around 7,000 because 70 x 100 equals 7,000.
  • Children will learn to be able to estimate beyond math as well. For example, when traveling, estimating the time it takes to arrive somewhere is an important skill.
  • Children will recognize that specific words and phrases such as “about, close, a little more, a little less” and more are linked to estimating.

Vocabulary:

  • Precision (in STEAM). When more than one measurement is close to each other. If you throw three darts at a dart board and they all stick to the bottom of the board close together, it is precision and not accuracy.
  • Accuracy (in STEAM). When a measurement is close to the correct number or standard. If you throw three darts at a dart board and they all stick to the bullseye, it is precision and accuracy.

Floating Ball Experiment: Discovery at Home


Today from Discovery at Home: Learn about Bernoulli's principle with this floating ball experiment! This activity is presented in English and Spanish thanks to our friends at Hill's Pet Nutrition.


Ice Cube Engineering: Discovery at Home

Supplies:

  • Ice cubes (rectangular shaped ice is recommended).
  • Plate or tray.
  • Paper towel or cloth towel.

Directions:

  1. First, try building a tower with ice cubes on a plate. See how high you can make the tower.
  2. Think about the foundation. Is it too slippery? Use a piece of cloth or a paper towel under your ice cube structure to experiment with creating a more stable foundation.
  3. Continue to experiment with other materials as a foundation for your ice structure. Enjoy building!

Ways to expand it:

  • Use different shapes and sizes of ice. How does this change the process? Does it make it easier or harder to create?
  • What happens when you put your ice structure in the freezer after it is complete? Does it make it sturdier?
  • Try using a sponge as part of your structure.

How do kids benefit?

  • States of matter. Gas, solid, liquid are the three states of matter. This activity focuses on solids and liquids. The longer it takes to build the structure, the more the ice melts and turns to liquid.
  • Experimentation! When kids experiment, they're learning how to learn. Failure is an important part of experimenting, so let kids try things that won’t work. It’s how they figure things out!
  • Hand eye coordination. Young children can use activities like building to help improve communication between their minds and bodies.
  • Interactions between materials. Children can experiment with different materials as a foundation to see how they interact with the ice cubes.
  • Sensory play! Sensory play that lets children touch, squeeze, smell and feel helps build connections in the brain.

Vocabulary:

  • Foundation. The base or platform that supports a structure.

Pom Pom Launcher: Discovery at Home

Supplies:

  • Paint stick
  • Sand Paper
  • Small binder clip
  • Rubber band
  • Pom Poms!

Directions:

  1. Grab a paint stick. This is the base of the shooter.
  2. Grab some sandpaper and sand the paint stick. Make sure it is smooth. (sandpaper is a sensory tool )
  3. Grab your binder clip and rubber band. Clip the rubber to one end of the paint stick.
  4. Duct tape the clothes pin to the other end of the paint stick.
  5. Make sure the clothes pin is secured down to the paint stick.
  6. Decorate your paint stick with markers or paint.
  7. Next pull the rubber band using two fingers all the way to the clip at the other end and clip it into the clothes pin. Place a pom pom in place.
  8. Press down on the clothes pin and watch it fly!

Ways to expand it:

  • Try adding a thicker rubber band. What happens to the distance of the pom pom when launched?
  • Try using something other than a pom pom. Does a ping pong ball work?
  • Have a competition. Have someone in your family create another launcher. See who can launch a pom pom the farthest.

How do kids benefit?

  • Basic engineering skills. Creating a launcher using the materials to test and see how far you can launch a pom pom. Engineers solve problems with constraints. They learn to solve problems by using the engineering design process: asking questions, coming up with solutions, building, testing and improving.
  • Fine motor skills. Using your fingers to pull the rubber band back, and then releasing it.
  • Hand eye coordination. Use your hands to pull back the rubber band and clip it into the clothes pin.
  • Sensory play! How does the sand paper feel as you rub it across the paint stick?

Vocabulary

  • Force: energy caused by a push or a pull, in this case, the pull created by your hand when you pull the rubber band, and the push created by the rubber band against the paint.
  • Potential Energy: The amount of energy an object stored up in something. A rubber band stretched by your fingers has lots of potential energy!
  • Kinetic energy: The amount of energy an object has when in motion. When your hand releases the rubber band, it loses potential energy but gains kinetic energy.

Paper Airplane Engineering: Discovery at Home

Supplies:

  • Paper (computer, recycled, lined, etc)
  • Cardboard/poster board/recycled materials.
  • Tape.

Directions:

  1. Create a target for the paper airplane to fly through.
  2. Cut a hole large enough for a paper airplane to fly through in a piece of cardboard or poster board.
  3. Tape or set up your target to a chair, wall, or somewhere safe for the paper airplane to fly.
  4. Create a paper airplane. Follow along with our video tutorial or create your own!
  5. Test the airplane by flying it through the target. If the plane does not fly well, adjust your plane and try again until it flies as well as you want it to.

Ways to expand it:

  • Create a table of your testing! You could use chalk on the ground outside to record!
  • Create multiple targets for the plane to fly through during one flight!
  • Move your starting point back further away from the target.

What kids learn:

  • Basic engineering skills. Engineers solve problems with constraints, in this case, limited materials and air pressure. Learn to solve problems by using the engineering design process: asking questions, coming up with solutions, building, testing and improving.
  • Aerospace engineering. A field in engineering that focuses on how different aircraft are made.
  • Aerodynamics. Learn through experimentation which shapes work best during flight as well as how the material of the structure interacts with air.
  • Fine motor skills. Kids practice using the small muscles in their hands later used for writing.
  • Experimentation! When kids experiment, they're learning how to learn. Failure is an important part of experimenting, so let kids try things that won’t work. It’s how they figure things out!

Vocabulary:

  • Aerodynamics: The part of physics that deals with how different objects interact with air. It also looks at an object’s shape and how air flows around it.
  • Constraint. A limitation or restriction. Materials, time, and space are common constraints. Real engineers have to work around constraints all the time!
  • Air pressure. The weight of air molecules. Air moves from areas of high pressure to areas of low pressure.
  • Force. Energy caused by a push, pull, or gravity.
  • Push: A action when you move something away from your body or an object.
  • Lift: A force that goes against the weight of the plane and raises it. It pushes against the plane.
  • Thrust: When something accelerates or is pushed one way, a thrust force is created in the opposite direction. It is a type of push force.

Robotic Hand: Discovery at Home

Supplies:

  • Tape. 
  • Scissors. 
  • Cardboard or cardstock paper. 
  • Standard drinking straws. 
  • Pearl drink straws or bigger diameter straws. 
  • Yarn or twine.

Directions:

  • Step 1: Gather supplies.
  • Step 2: Create your hand. Trace your hand on a cardboard or cardstock paper. Cut the traced hand out (try cutting it a little bigger than the line you drew).
  • Step 3: Create Joints. Mark your finger joints on the cutout. Draw joints straight or curved.
  • Step 4: Put it all together!
    • Fold the finger joints at the lines.
    • Cut standard drinking straws to size (leave a little gap between the lines to help thread the yarn).
    • Tape straw pieces to the hand.
    • Thread yarn through the straw pieces. Each finger will have a length of yarn of its own. Thread all five pieces of yarn through the bigger straw.
  • Step 5: Play! What can your robotic hand do?

Ways to expand it:

  • Scientists working in the filed of robotics often use the human body as inspiration for the way robots move and work. What other cardboard parts can you build that work like your body? How might these parts be able to solve problems?
  • How big could you make this? Try making a larger hand!
  • What happens if you only pull one string, does it work? Could you pick something up?
  • Try using the hand to pick up an object. Does it work as well as your hand? Why or why not?
  • What gestures can you make with your hand? Can you do a thumbs up?
  • What happens if you use a rubber band instead of string? How would that change the movement of the hand?

What kids learn:

  • Anatomy: the strings in your robot hand function much like the tendons in your own hand, which connect muscles to bones and let you bend your fingers. Your muscles create the pull that make your fingers bend and let you pick things up, just like your robot hand.
  • Basic engineering skills. Engineers solve problems with constraints, in this case, limited materials and air pressure. They learn to solve problems by using the engineering design process: asking questions, coming up with solutions, building, testing and improving.
  • Fine motor skills. Kids practice using the small muscles in their hands later used for writing.
  • Cause and effect: see how the hand reacts when you pull the strings.
  • Materials. The body is made up of certain types of materials which create the movements needed.
  • Modeling. Modeling is an important method in STEAM career fields. Models help professionals study and learn about a certain subject.
  • Further reading: Learn how real robotic hands are helping amputees regain function

Vocabulary:

  • Tendon: a band of connective tissue which connects a muscle to a bone. Muscles pull tendons to create movement in your hand.
  • Body tissue. A group of cells that look similarly and work together in the body.
  • Muscle. A collection of tissue that can contract which allows you to move your body or keep your body in a certain position.
  • Tension: The state of being stretched tight.
  • Pull: A pull is the force of bringing an object closer.
  • Force: Strength or energy as an attribute of physical action or movement
  • Robotics: a field of science that uses engineering to make machines, called robots, that can perform a task.

Bubble Tool Engineering: Discovery at Home

Supplies:

  • Bubble solution. (Don't have it? You can engineer that, too!)
  • Clothespins, sticks, dowel rods or cardboard.
  • String or ribbon.
  • Elastic hair ties or rubber bands.
  • Empty plastic water bottle.
  • Optional: Pipe cleaner or twist tie.
  • Optional: Tape, push pins or glue.
  • Optional: An old tshirt or rag (that can be ruined).

Directions:

  • Create multiple tools out of different materials and try blowing bubbles to see which tool works the best.
  • Tip: in order to blow bubbles using the bubble tool, the tool needs to be able to have a stream of airflow through an opening in a material.
  • Gather your results and determine which tool is the best.

Tool creation suggestions:

  • Ribbon and clothespins: Create a circle using ribbon. Connect a clothespin to one side of the circle and one clothespin to the other side of the circle. When you test it in bubble solution, keep the circle close together, then pull apart to create the circle needed to create a bubble.
  • Pipe cleaners, hair ties, rubber bands or twist ties: Create circles using pipe cleaners, hair ties, rubber bands, or twist ties. Connect them to a clothespin which will act as the bubble wand handle.
  • Empty water bottle: Cut the bottom of a water bottle off. Remove the lid. Dip the opening at the bottom in the bubble solution. Blow into the smaller opening of the water bottle, which will force the stream of air through the bottle to create the bubble at the larger opening.

Ways to expand it:

Create a table or graph of your testing! You could use chalk on the ground outside to record.

What kids learn:

  • Basic engineering skills. Engineers solve problems with constraints, in this case, limited materials and air pressure. They learn to solve problems by using the engineering design process: asking questions, coming up with solutions, building, testing and improving.
  • Fine motor skills. Kids practice using the small muscles in their hands later used for writing.
  • Experimentation! When kids experiment, they're learning how to learn. Failure is an important part of experimenting, so let kids try things that won’t work. It’s how they figure things out!
  • Interactions between materials. When mixing different materials together, kids learn how the combination acts before, during, and after the mixing.

Vocabulary:

  • Constraint: a limitation or restriction. Materials, time, and space are common constraints. Real engineers have to work around constraints all the time!
  • Force: energy caused by a push, pull, or gravity. In this activity, your lungs force air from your body against the soap film to create a bubble.

Ask a Spacesuit Engineer with Kristine Davis, NASA