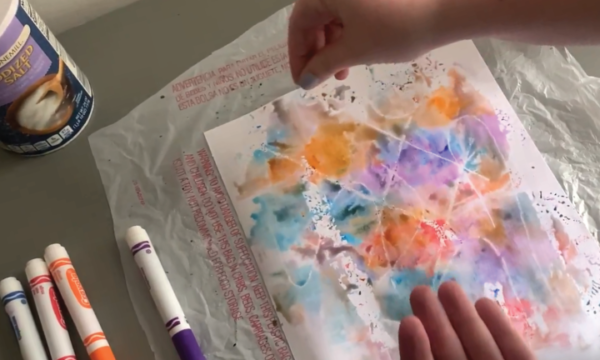
Egg Carton Flowers: Discovery at Home

What you need:

  • 1 Egg carton.
  • Scissors.
  • Paints, markers or crayons.
  • Glue.
  • Piece of paper.
  • Popsicle stick or pipe cleaners.
  • Ribbon, string or yarn.
  • Clothes pins.
  • Pencil/pen.
  • Button, sequin, glitter glue or felt cotton ball.

Directions:

  • Cut off the sections of the egg carton that would hold each egg. This will be your flower shape.
  • Paint or use markers or crayons to color a flower on your egg carton piece.
  • You can attach your flower in various ways such as:
  • Poke a hole through the center of the flower. Then cut some string and thread it through the hole and tie a knot. You can either hang it or wear it as a bracelet.
  • Attach your flower to a clothes pin with glue.
  • Poke a hole through your flower and attach a pipe cleaner.
  • You can also use a pen/pencil and poke a hole through your flower and use it as a pen/pencil topper.
  • Add a button, sequin, glitter glue or a felt cotton ball to the center of your flower

How to Expand it?

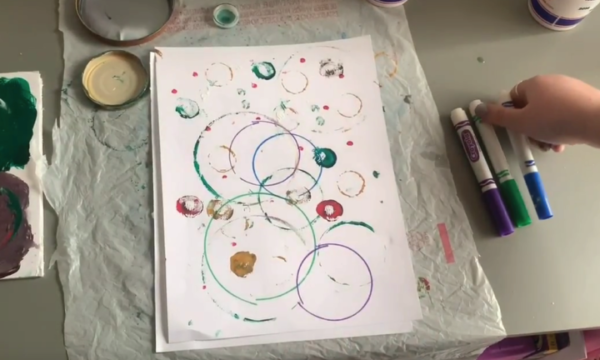
  • What other ways can you think of to display your flowers?
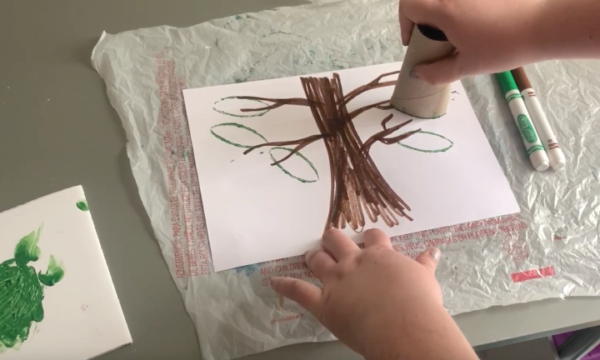
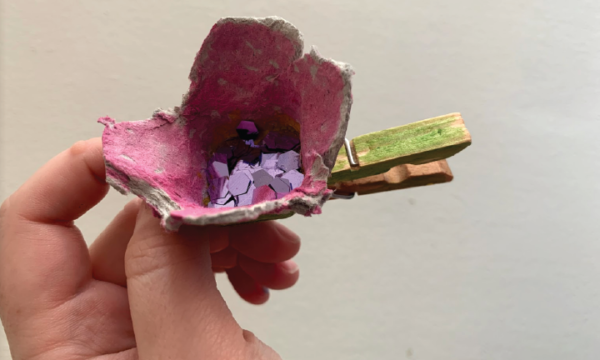
  • Make a flower look like a flower you’ve seen before or a flower in your yard.
  • Draw, paint, or add an insect to your flower, such as a bee or butterfly.
  • Try making paper flowers or running your own flower shop

What Kids Learn:

  • Fine motor skills. Kids practice using the small muscles in their hands later used for writing.
  • Symbolic thinking, or the ability to think about one thing representing something else. When small children begin to connect a paper flower to the flowers they see in the yard, they start building the connections in the brain that allow for reading and learning later.
  • The purpose of a stem! Stems support the leaves and the flower petals which help keep them in the sunlight. The stems also store nutrients and transport fluids from the roots to keep the flower alive. 
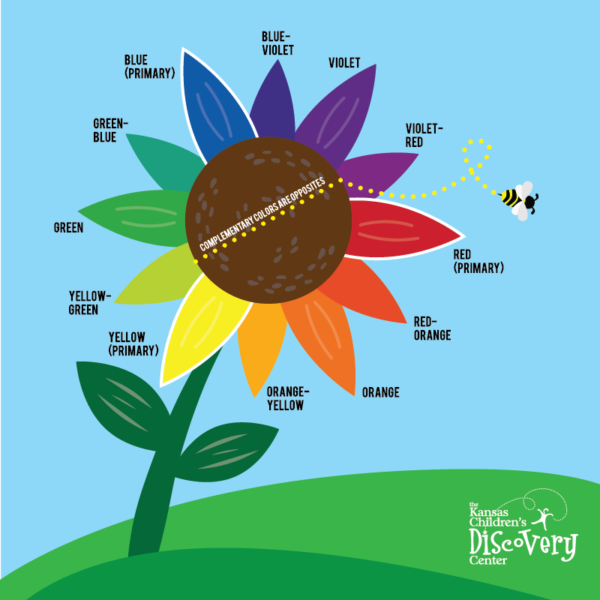
  • Why are flower petals colorful? Flower petals are colorful because the color attracts birds, bees and other insects. The insects land in the flower and spread pollen, which helps fertilize the flowers and create seeds which will then make more flowers!
  • Vocabulary:
    • Anther: Oval shaped structure which holds the pollen.
    • Filament: Tube like shape which holds the anther upright for pollinators such as bees and butterflies.

Floral Designer: Discovery at Home

What you need:

  • Artificial flowers
  • Paper
  • Crayons/markers/colored pencils
  • Scissors
  • Tape
  • Vase/cup/recycled materials
  • Ribbon

Directions:

  1. Make a variety of different flowers using paper or other materials. See the videos below for ideas on making paper flowers, or check out our egg carton flower activity for another fun option!
  2. Get flower orders from others in your household. Use their favorite colors, types of flower, and other interests to make an arrangement just for them!
  3. Practice arranging the flowers in a cup or vase by color, shape, and size. Experiment to find the best arrangement.
    1. Should you use complimentary colors or tertiary colors?
    2. Should the flowers all be the same height? Size?
    3. What can you add to the flowers to make your arrangement more special?

Paper Rose Tutorial

Floral Designer and Simple Paper Flower Tutorial

Ways to expand it:

  • Set up several different bouquets and arrangements and create a pretend floral shop! Have your family visit your shop and buy flowers or place orders for special occasions. Assign prices, take payments and fulfill orders.

What kids learn:

  • Children gain social and emotional skills through dramatic play. When they pretend, they are experimenting in social roles, practicing language, and solving problems.
  • Fine motor skills. Kids practice using the small muscles in their hands later used for writing.
  • Experimentation! When kids experiment, they're learning how to learn. Failure is an important part of experimenting, so let kids try things that won’t work. It’s how they figure things out!

Vocabulary:

  • Complementary colors:  Colors that are on opposite sides of the color wheel. For example, yellow and purple, blue and orange, red and green. Complementary colors contrast each other and tend to look more bright and vivid when placed next to each other. Mixing complementary colors in a floral arrangement will create a bright, vivid arrangement that pops!
  • Tertiary colors: Colors that are next to each other on the color wheel. For example, orange and yellow, blue and green, red and purple. Tertiary colors match each other and are often found together in nature. They usually match well and create serene and comfortable designs. Mixing tertiary colors in a floral arrangement will create a calm, serene design that is pleasing to the eye.

The Color Wheel


Tube Tree Painting Process Art: Discovery at Home

Supplies:

  • Paper
  • Toilet paper or paper towel rolls x2
  • Various colored paints
  • Various colored markers
  • Paper plate, cardboard box cutout, or palette

Directions:

  1. Draw a tree trunk with branches on a piece of paper.
  2. Color the tree trunk and branches in with markers or paint.
  3. Wait until the tree trunk is dry before making leaves.
  4. While you’re waiting for your tree trunk and branches to dry, prepare your paint for leaves on a paper plate, cardboard box square or palette.
  5. Take your toilet paper roll and squeeze it flat, then slightly bend it back so it makes an eye shape.
  6. Press the eye shaped edge of the toilet paper roll into your paint and start pressing/stamping leaves onto your tree’s branches.
  7. You can also use markers to trace around the toilet paper roll on the page.
  8. Add as many leaves as you’d like!

How to Expand it:

  • Are leaves only green? Try using different colors for your leaves.
  • Fold, cut, or bend your roll to make a different leaf shape.
  • What other objects can you use to create a leaf shape on your artwork?

What Kids Learn:

  • Spring has just begun! Leaves are starting to grow back on the trees. What signs can you see that spring is starting?
  • Kids can learn how leaves use the process of photosynthesis for food and how sunlight helps trees grow. Add painting or drawing of the sun on your page to give your tree some food!
  • Symbolic thinking, or the ability to think about one thing representing something else. When small children begin to connect a tree on paper to the tree on their street, they start building the connections in the brain that allow for reading and learning later.
  • Science vocabulary:
    • Leaf: a flattened structure of a higher plant, typically green and blade-like, that is attached to a stem directly or via a stalk. Leaves are the way trees absorb sunlight and breathe.
    • Spring: the season after winter and before summer, in which vegetation begins to appear.
    • Photosynthesis: How plants eat! The process plants use to take energy from the sun and convert, or change it, into the energy they need to grow.

Rubber Band Process Art: Discovery at Home

Supplies:

  • Rubber bands (up to five)
  • Cardboard box, cereal box, or cake pan
  • Paint
  • Paper
  • Scissors

Directions:

  1. Cut a square opening in your box. 
  2. Put Rubber bands around your box over your square opening, use about 2 - 5
  3. Put sheet of paper in the open area of the box, under your rubber bands
  4. Use your finger to brush paint on the underside of the rubberband 
  5. Now pull back the rubber band and watch the paint spread onto the page
  6. Add as much paint as you want to the rubber bands and follow step 4 until you feel like it is complete

How to Expand it:

  • Experiment with different shapes and sizes of rubber band and observe differences. 
  • Use the rubber bands to make a song while you paint!

What Kids Learn:

  • Fine motor skills. Kids practice using the small muscles in their hands later used for writing. This activity is great for practicing the pincer grasp, or using the index finger and thumb together to grab an item, an important developmental milestone for small children.
  • Experimentation! When kids experiment, they're learning how to learn. 
  • Vocabulary:
    • Process Art: an artistic movement as well as a creative sentiment where the end product of art and craft is not the principal focus. Process art is about the journey, not the destination!
    • Force: energy caused by a push or a pull, in this case, the pull created by your hand when you pull the rubber band, and the push created by the rubber band against the paint.
    • Potential Energy: The amount of energy an object stored up in something. A rubber band stretched by your fingers has lots of potential energy!
    • Kinetic energy: The amount of energy an object has when in motion. When your hand releases the rubber band, it loses potential energy but gains kinetic energy.


Circle Process Painting: Discovery at Home

Materials Needed:

  • Circular items: lids, bottle caps, water bottles, cans, egg cartons, cotton swabs
  • Paints (tempera or acrylic works best)
  • Paper
  • Paper plate

Directions:

  • Collect circular items like lids, bottle caps, cotton swabs, or other rounded items around the house.
  • Put desired paints on a paper plate or pallette
  • Press different materials into the paint and press them on the paper

How to Expand it:

  • Once dry, use markers to outline your different materials on top of your painting to add more circles, or create a new design on top of your circles.
  • Try to count how many circles end up on the page.
  • See if you can make other shapes when adding circles together, or if overlapping circles create new shapes.

What do kids learn?

  • Spatial or visual thinking. Being able to imagine the positions of objects and how they interact is an important skill for learning math. Putting an object in paint and seeing how that object contacts the paper is a great way to develop spatial thinking skills.
  • Fine motor skills. Kids practice using the small muscles in their hands later used for writing.
  • Art can be made with unconventional materials. You don’t need a paintbrush to paint! Using diverse materials for art encourages creativity and imagination.
  • Art Vocabulary:
    • Geometric shape - a circle is a geometric shape that is made by drawing a curve that always has the same distance from the point at the middle.

Watercolor Resist with Markers and Crayons: Discovery at Home

Materials Needed:

  • Various colored markers
  • Various colored crayons (white preferred)
  • Plastic baggy
  • Paper
  • Plastic cup with water
  • Paint brush
  • Optional: use wet rag to wet down paper
  • Optional: Salt

Directions:

  1. Grab a piece of paper and Choose a crayon, this could be any color but white is preferred so you can see your drawing come to life!
  2. Use the crayon to make a design on the paper. You could make a specific design or scribble whatever you like
  3. Lightly wet your paper with a paint brush or a rag.
  4. Using your color markers, scribble on the plastic baggy using different colors.
  5. Open the bag, stick your hand inside and press the bag on your wetted paper, this turns the markers into water colors and blends the colors together.
  6. Press where you like on your paper, add more marker to your baggy if you like. Once the marker is applied you will begin to see your resist drawing!

How to Expand it:

  • Use salt to add your painting while its still wet to see an interesting chemical reaction!
  • Try the activity on different materials: cardboard, glossy magazine paper, aluminum foil, and observe the differences.

What do kids learn?

  • Interactions between materials. The resist works because wax, which is made from oil, will not mix with the water-based ink of the markers. Oil and water don't mix because they contain different kinds of molecules and will not bond with each other.
    • Psssst...for another really cool at-home experiment that uses oil and water resistance, check out Spooky Lava Lamps!
  • Art encourages symbolic thinking, or the ability to think about one thing representing something else. When small children begin to connect a house on paper to the house they live in, they start building the connections in the brain that allow for reading and learning later.
  • Art Vocabulary:
    • Negative space: The space around and between the parts of an image.
    • Resist: an art technique that uses layers of different materials to make a design in negative space.
    • Wax: The material crayons are made of, water and wax do not mix because wax is made from oil.

Wash Your Hands, Shark!

Wash Your Hands, Shark!

The Discovery Center team has our very own pro-handwashing version of everyone's favorite shark song! Learn more about how to encourage healthy handwashing at https://www.cdc.gov/handwashing/


Health Resources for Your Family