Straw Oboe: Discovery at Home

What you need:

  • Drinking straw.
  • Scissors.

Directions:

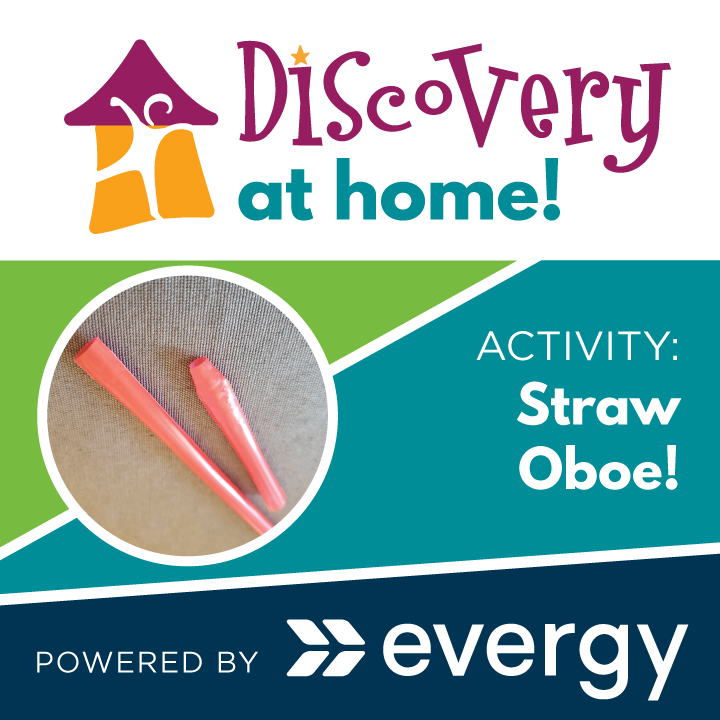
  1. Flatten about an inch of the straw at one end really well.
  2. Where the straw is creased, cut both edges of the bent part of the straw.
  3. Force air through the straw until you hear a buzzing sound from the vibrations created.
  4. When you find the “sweet spot” that creates the sound, you’ve done it! It might take a few tries to get it, but don’t give up!

Ways to Expand the Activity:

  • Change the shape of the flattened and cut end of the straw. Does it work if it is cut in a triangular shape?
  • Change the length of the straw by cutting the end opposite of the “reed” or flattened and cut end. What happens?
  • Add holes down the straw on one side to act as keys. What happens when you cover all of them and play your straw oboe or cover only a few?

What Kids Learn:

  • Sound waves. Sounds waves are made up of vibrations that travel through the air, water and objects. The sound waves that reach our ears make our eardrums vibrate. Exploring the vibrations that are sound waves through hands-on activities help create a better understanding of how sound waves travel.  
  • How a double reed works. The reeds constantly close and open making the vibrations to help create sound through the instrument.

Solar Rainbow Dances: Discovery at Home

What you need:

  • Two pieces of paper.
  • Scissors.
  • CD.
  • Tape.
  • Sunny day.

Directions:

  1. Create a paper snowflake using one of the pieces of paper.
  2. Tape the paper snowflake to the blank/more reflective side of the CD so that the tape is only on the label side.
  3. Head outside on a sunny day and tape the other piece of paper to a fence/wall/window or have someone hold it for you.
  4. Reflect the sunlight so it hits the patterned CD and shows the colorful reflection on the paper.
  5. Move the CD back and forth and rotate it. You’re creating a dancing rainbow!

Ways to Expand the Activity:

  • Trace the patterns that are reflected.
  • Cut different paper snowflakes and compare the different patterns that are reflected.
  • Try to cut out a specific shape to create a pattern that you want to create.
  • Use a flashlight. Are you able to create the rainbow dances inside using a flashlight?

What Kids Learn:

  • Interference patterns. When light passes through something with small defects like scratches, you can see rainbow colors and unique patterns.
  • Experimentation! When kids experiment, they're learning how to learn. Failure is an important part of experimenting, so let kids try things that won’t work. It’s how they figure things out!

Vocabulary:

  • Reflection. Change in direction of a wave that returns waves back from a surface.

Stop Motion: Discovery at Home

What you need:

  • Crayons/toys/other items.
  • Camera.
  • Tripod or place you can set your camera where you will be able to take a picture from the same exact spot.

Directions:

  1. Think about what action you want your pieces to do.
  2. Set up the camera on the tripod/place you designated.
  3. Prepare the stage (camera frame) where you will set up each scene.
  4. Set up the first scene and take a picture.
  5. Move the items slightly and take another picture with the camera in the same spot.
  6. Move the items again slightly, and take another picture with the camera in the same spot.
  7. Continue taking pictures and moving the items slightly until you finish your scene. For example, if you were wanting to spell something out using crayons, you would start with two crayons in the frame, move them slightly and add another crayon, move them slightly and add another crayon.
  8. Continue moving the crayons until they form the word you are planning.
  9. Some cell phones have technology to create gifs and slideshows. You could use apps, Powerpoint or Google Slides to create the story as well. Use your pictures, in order, and the phone’s function to create the video.

Ways to Expand the Activity:

  • Tell a story using the pictures. You could add written words, and multiple items into the story.
  • Try using a person in the stop motion. Challenge yourself to move slightly while someone takes the pictures.

What Kids Learn:

  • Experimentation! When kids experiment, they're learning how to learn. Failure is an important part of experimenting, so let kids try things that won’t work. It’s how they figure things out!
  • Storytelling. Kids are able to be creative, explore their imagination, and set the foundation for thinking outside the box.

Vocabulary

Stop motion. The process of filming objects one frame at a time while making small changes in each photo, giving the illusion of motion when the photos are viewed in rapid sequence.

Recycled Crayons: Discovery at Home

What you need:

  • Broken pieces of crayons without wrapping (the smaller the better).
  • Sunshine on a hot day.
  • Foil.
  • Cookie cutters.
  • Plate.
  • Oven mitts.

Directions:

  1. Wrap the plate with foil.
  2. Create a tent-like piece of foil that covers part of the foiled plate.
  3. Set the cookie cutters on top of the foiled plate.
  4. Place the broken pieces of crayons in the cookie cutter.
  5. Set the plate outside in direct sunlight on a hot day.
  6. Check on the melting process every half hour or so.
  7. When the crayons look melted enough, use oven mitts to move the plate into the shade.
  8. Let the plate cool down.
  9. After the plate and contents cool down, remove the newly formed crayons from the cookie cutters.
  10. Test out the new crayons!

Ways to Expand the Activity:

  • Experiment with color mixing when setting up the activity. What happens when you mix yellow and blue crayons together? What happens when you mix the melted crayons during the melting process? (Be cautious because the plate and its contents will be hot)!
  • Compare and contrast how fast different colored crayons melt. In one cookie cutter put dark crayons and the other put lighter colors. Which one melts faster?
  • Create art using the sun and science! Set out a piece of paper in the direct sun and sprinkle pieces of crayon on the paper.

What Kids Learn:

  • Experimentation! When kids experiment, they're learning how to learn. Failure is an important part of experimenting, so let kids try things that won’t work. It’s how they figure things out!
  • Phase transition from a solid to a liquid. When wax reaches its melting point it begins to turn into a liquid.

Vocabulary:

  • Thermodynamics. A branch of science that deals with heat relating to other forms of energy.

Wax Paper Monoprint: Discovery at Home

What you need:

  • Wax paper.
  • Paper.
  • Paints.
  • Paint brush.
  • Comb, back of paintbrushes, or cotton swab to add textures (optional).

Directions:

  1. Cut a sheet of wax paper.
  2. Paint on your wax paper however you’d like.
  3. Use your finger, a comb, the back of a paintbrush, or a cotton swab to add textures and/or designs to your paint.
  4. Set a piece of paper on top of your wax paper and press down.
  5. Peel off the piece of paper and you’ll see the print you just made!

What kids learn:

  • Fine motor skills. Kids practice using the small muscles in their hands later used for writing.
  • Symbolic thinking, or the ability to think about one thing representing something else. When small children begin to connect a tree on paper to the tree on their street, they start building the connections in the brain that allow for reading and learning later.

Vocabulary:

  • Printmaking. The activity or occupation of making pictures or designs by printing them from specially prepared plates or blocks.
  • Texture. The feel, appearance, or consistency of a surface or a substance.
  • Monoprint. A print that is usually limited to one copy. Mono means one. A monoprint is typically drawn or painted onto a plate, block, or surface and then transferred onto paper.

Recycled Fashion Show: Discovery at Home

What you need:

  • Recycled materials from around the house.
  • Tape.
  • Scissors.

Directions:

  1. Challenge each person in the family to create costumes using recycled materials.
  2. Suggestions: Hats, vests, shoes, monster limbs, tails, etc.
  3. When everyone is finished with their creations, take turns presenting your costumes to the family to showcase what everyone created!

Ways to expand:

  • Engineers work with constraints or restrictions. Create a set of guidelines that everyone has to follow. There could be a time limit, a certain number of resources, items, or materials, only items of a certain color, etc.
  • Create a theme. The costumes would have to be made with certain elements of a theme. For example, you could choose animals, animated characters, etc.
  • Record the presentation of all your costumes and challenge another family or friend to do the same.
  • Put on a play! Create a story and dress your characters.

What kids learn:

  • Basic engineering skills. They learn to solve problems by using the engineering design process: asking questions, coming up with solutions, building, testing and improving.
  • Engineering is utilized in a variety of fields. Engineers are needed to help create better shoes, learn about materials and how they can be used in unique ways, etc.
  • Fine motor skills. Kids practice using the small muscles in their hands later used for writing.
  • Experimentation! When kids experiment, they're learning how to learn. Failure is an important part of experimenting, so let kids try things that won’t work. It’s how they figure things out!
  • Dramatic play. Kids try out different roles, practice communication and learn about their interests when they play pretend. Pretend play is an especially critical way for kids to process scary or difficult situations.

Vocabulary:

  • Constraint. A limitation or restriction. Materials, time, and space are common constraints. Real engineers have to work around constraints all the time!

Tube Pendulum Process Art: Discovery at Home

Materials:

  • Toilet paper roll.
  • Yarn or string.
  • Markers.
  • Tape.
  • Paper.
  • Scissors, pencil, pen, or hole punch to poke holes.

Directions:

  1. Poke 4 holes in your toilet paper roll. Poke them on the top edge of your roll.
  2. Thread a 6 inch piece of yarn through the holes criss-crossing to form an “X” at the top.
  3. With a second piece of yarn, approximately 2 feet long, double it so that it is half its length when tied to the “X” on the top of your pendulum tube.
  4. Tape 3 or 4 makers to the side of the pendulum body. Uncap the markers.
  5. Suspend the pendulum above the page. Lower the markers until the tips touch the page and leave a mark.
  6. Create motion and watch what happens next!

Ways to expand:

  • Try to use the tube with the markers attached as your drawing tool. Hold in your hand and draw with it.
  • Experiment with different kinds of motion. Spin, push, pull, and see how your art changes.
  • Go on a pendulum hunt! Can you find examples of a pendulum in your house?

What kids learn:

  • Process art is an artistic movement as well as a creative sentiment where the end product of art and craft is not the principal focus. Process art is about the journey, not the destination!
  • The bob is the weight on the string
  • A pendulum works by converting energy back and forth, a bit like a roller coaster ride. When the bob is highest (furthest from the ground), it is moving the slowest and has maximum stored energy (potential energy). When it is lowest (closest to the ground), it is moving the fastest and has kinetic energy. So as the bob swings (oscillates) back and forth, it repeatedly switches its energy back and forth between potential and kinetic.
  • Pendulums swing with a reliable pattern and operate with the invisible force of gravity. Earth’s gravity attracts the pendulum. When the pendulum is hanging still, the yarn and weight are straight and at a 90-degree angle to the Earth as gravity pulls the string and the weight to the Earth. Sir Isaac Newton (1642-1727) made use of this early work as he developed the laws of motion.

Spin Art: Discovery at Home

Supplies:

  • Paper plate.
  • Box (choose a box that is larger than the paper plate).
  • Pencil.
  • Various colored paints. 

Directions:

  1. Cut a hole in the middle of your paper plate.
  2. Cut a hole in the middle of your box.
  3. Poke pencil through the hole in the paper plate and through the hole in the box so that the pencil stands straight up and the paper plate is above the box.
  4. Pour 2-4 different colored paints onto the paper plate.
  5. Use your hand to help spin the plate, while repeatedly grabbing the edge of the plate and quickly rotating the plate.
  6. See how the paint will begin to spread out over the plate and drip into the box.
  7. Leave the paper plate above the box to dry.

Ways to expand it:

  • If you have a helper, have them spin the plate while you add paint with a paint brush or markers. Pressing a paint brush or markers lightly on the paper plate while the plate is spinning can create circles.
  • Make predictions! How far will the paint splatter? Will the colors mix together? Does adding water to the paint change your results?


What kids learn:

  • Fine motor skills. Kids practice using the small muscles in their hands later used for writing.
  • Experimentation! When kids experiment, they're learning how to learn. Failure is an important part of experimenting, so it is valuable to let kids try things that won’t work. It’s how they figure things out!

Vocabulary

  • Inertia: The resistance of an object to change its motion or direction. Your paint will stay on the plate until a force, like spinning the plate, acts to make it move, then it will keep moving until friction or another object slows it down.
  • Force: energy caused by a push or a pull, in this case, the push created by the movement of your plate
  • Newton’s First Law of Motion: Every object will continue moving at the same speed or remain still unless something makes it change.
  • Centrifugal force: the apparent force felt by an object moving in a curved path that acts outwardly away from the center of rotation.

Robotic Hand: Discovery at Home

Supplies:

  • Tape. 
  • Scissors. 
  • Cardboard or cardstock paper. 
  • Standard drinking straws. 
  • Pearl drink straws or bigger diameter straws. 
  • Yarn or twine.

Directions:

  • Step 1: Gather supplies.
  • Step 2: Create your hand. Trace your hand on a cardboard or cardstock paper. Cut the traced hand out (try cutting it a little bigger than the line you drew).
  • Step 3: Create Joints. Mark your finger joints on the cutout. Draw joints straight or curved.
  • Step 4: Put it all together!
    • Fold the finger joints at the lines.
    • Cut standard drinking straws to size (leave a little gap between the lines to help thread the yarn).
    • Tape straw pieces to the hand.
    • Thread yarn through the straw pieces. Each finger will have a length of yarn of its own. Thread all five pieces of yarn through the bigger straw.
  • Step 5: Play! What can your robotic hand do?

Ways to expand it:

  • Scientists working in the filed of robotics often use the human body as inspiration for the way robots move and work. What other cardboard parts can you build that work like your body? How might these parts be able to solve problems?
  • How big could you make this? Try making a larger hand!
  • What happens if you only pull one string, does it work? Could you pick something up?
  • Try using the hand to pick up an object. Does it work as well as your hand? Why or why not?
  • What gestures can you make with your hand? Can you do a thumbs up?
  • What happens if you use a rubber band instead of string? How would that change the movement of the hand?

What kids learn:

  • Anatomy: the strings in your robot hand function much like the tendons in your own hand, which connect muscles to bones and let you bend your fingers. Your muscles create the pull that make your fingers bend and let you pick things up, just like your robot hand.
  • Basic engineering skills. Engineers solve problems with constraints, in this case, limited materials and air pressure. They learn to solve problems by using the engineering design process: asking questions, coming up with solutions, building, testing and improving.
  • Fine motor skills. Kids practice using the small muscles in their hands later used for writing.
  • Cause and effect: see how the hand reacts when you pull the strings.
  • Materials. The body is made up of certain types of materials which create the movements needed.
  • Modeling. Modeling is an important method in STEAM career fields. Models help professionals study and learn about a certain subject.
  • Further reading: Learn how real robotic hands are helping amputees regain function

Vocabulary:

  • Tendon: a band of connective tissue which connects a muscle to a bone. Muscles pull tendons to create movement in your hand.
  • Body tissue. A group of cells that look similarly and work together in the body.
  • Muscle. A collection of tissue that can contract which allows you to move your body or keep your body in a certain position.
  • Tension: The state of being stretched tight.
  • Pull: A pull is the force of bringing an object closer.
  • Force: Strength or energy as an attribute of physical action or movement
  • Robotics: a field of science that uses engineering to make machines, called robots, that can perform a task.

Dandelion Playdough: Discovery at Home

What you'll need:

  • A BIG handful of dandelions.
  • 1 cup of boiling water.
  • 2 cups of flour.
  • ⅓ cup of salt (add more as needed).
  • 2 tablespoons of baby oil (substitution: vegetable oil).
  • 1-2 tablespoons of cream of tartar (Substitution: white vinegar. Like cream of tartar, white -vinegar is acidic).
  • Optional- Blender (helps to blend the water with the dandelions to make a vibrant yellow).

Directions:

  1. Bring one cup of water to a boil and remove from heat. Cool slightly only if adding directly to the blender. Water can be heated using a microwave if you use a microwave safe container and oven mitt or other hand protection when removing the container after microwaving.
  2. In a blender, mix the hot water and dandelions OR enlist the help of your kiddos for this process! Separate the dandelions into pieces, pulling, tearing and mashing as they go. Sprinkle the dandelions into the boiled water to steep.
  3. Transfer the hot water to a bowl and add oil, salt, and cream of tartar. Stir until the salt is dissolved.
  4. Add 2 cups of flour to the mixture and mix well.
  5. With your hands, continue to mix. If it is sticky, sprinkle in more flour and knead until it no longer sticks. The amount of flour that you may need will vary based on how much moisture the dandelions contain.

Tips and Tricks:

  • Your blender will survive! If you pulverize the dandelions too much with the blender, it may not preserve as much of the yellow color. Try different levels of shredding.
  • Use fresh dandelions.
  • You can substitute white vinegar, though cream of tartar is preferred.
  • Using baby oil will give your mixture a nice fragrance.
  • You can add additional flour and salt. Adding more salt can cause the playdough to last longer, but you may feel the texture of the salt on your hands when playing with the playdough. If your kids are sensory defensive, use less salt.
  • You might consider using a wooden spoon because plastic spoons may break.
  • Not all yellow flowers are dandelions. Talk with your kids during your walk about the different types of petals and leaves. Have them identify by comparing and contrasting. Don’t pick your neighbors prized daisies by mistake! Be safe out there.

Benefits and How to Expand it:

  • Playdough can be squeezed, rolled, pinched, molded and flattened all using hand and finger muscles. This is a great pre-writing activity!
    Grasp, push, pull, and roll with a rolling pin to strengthen both hand and forearm muscles. Once it is flattened, bring on the cookie cutters!
  • Playdough is unbeatable for practicing scissor skills. Roll out: ”snakes” and give them a haircut! Do snakes have hair?
  • Practice life skills. Make sausages, meatballs, or roll dandelion cookies. Have your kids “teach” you to use a knife and fork and cut into bite sized pieces. Sing the meatball song if you know it! Miss Nancy sings it all the time for Wee Wednesday at the Discovery Center!
  • Forks are fantastic, but imagine what a potato masher can do! Introduce new tools from the kitchen. How do you think they are used?
  • Express yourself. Relax and enjoy this wonderful process activity and let your senses go with pure, sensory play.