Fort Engineering 101: Discovery at Home

Materials Needed:

  • Pillows
  • Fitted and flat sheets
  • Furniture
  • Broom
  • Safety pins, clothespins, chip clips, binder clips
  • Random household objects!

Directions:

  • Use furniture, blankets, and other materials to create a fort to fit the entire family!
  • Pro-level fort engineering tips:
    • Use fitted sheets. They can stretch and hold around chairs and other furniture pretty well.
    • Use heavy objects like soap bottles, books, and rocks to hold down blankets and sheets.
    • The back of the couch is a great place to start. Tuck your sheets there, or use a broom handle behind pillows to create a tall support.
    • Don’t forget forces! A sheet has to have equal forces pulling on it for it to stay in place as your roof.

How to Expand it:

  • Create constraints or challenges to encourage problem-solving. Can you build your fort with fewer materials? Can you make it tall enough for an adult to stand up in?
  • Encourage imagination. Can your fort serve as a veterinary clinic? A jungle hideout? A kitchen?

What do kids learn?

  • They experiment! When kids experiment, they're learning how to learn. Failure is an important part of experimenting, so let kids try things that won’t work. It’s how they figure things out!
  • Basic engineering skills. Engineers solve problems with constraints, in this case, limited materials and space. They learn to solve problems by using the engineering design process: asking questions, coming up with solutions, building, testing and improving.
  • Fort-building is a great lesson in force. Kids tend to spend a lot of time figuring out how to keep their roof from slipping off one side of the fort or the other. If a roof isn’t equally supported on both sides, putting even force on the sheet, it won’t stay put.
  • Spatial or visual thinking. Being able to imagine the positions of objects and how they interact is an important skill for learning math. Asking if the fort is big enough for a grownup to stand up in encourages spatial thinking.
  • Science Vocabulary
    • Force: energy caused by a push or a pull, in this case, the pull created by gravity and other supports on the roof of your fort!
    • Constraint: a limitation or restriction. Materials, time, and space are common constraints. Real engineers have to work around constraints all the time!

Watercolor Resist with Markers and Crayons: Discovery at Home

Materials Needed:

  • Various colored markers
  • Various colored crayons (white preferred)
  • Plastic baggy
  • Paper
  • Plastic cup with water
  • Paint brush
  • Optional: use wet rag to wet down paper
  • Optional: Salt

Directions:

  1. Grab a piece of paper and Choose a crayon, this could be any color but white is preferred so you can see your drawing come to life!
  2. Use the crayon to make a design on the paper. You could make a specific design or scribble whatever you like
  3. Lightly wet your paper with a paint brush or a rag.
  4. Using your color markers, scribble on the plastic baggy using different colors.
  5. Open the bag, stick your hand inside and press the bag on your wetted paper, this turns the markers into water colors and blends the colors together.
  6. Press where you like on your paper, add more marker to your baggy if you like. Once the marker is applied you will begin to see your resist drawing!

How to Expand it:

  • Use salt to add your painting while its still wet to see an interesting chemical reaction!
  • Try the activity on different materials: cardboard, glossy magazine paper, aluminum foil, and observe the differences.

What do kids learn?

  • Interactions between materials. The resist works because wax, which is made from oil, will not mix with the water-based ink of the markers. Oil and water don't mix because they contain different kinds of molecules and will not bond with each other.
    • Psssst...for another really cool at-home experiment that uses oil and water resistance, check out Spooky Lava Lamps!
  • Art encourages symbolic thinking, or the ability to think about one thing representing something else. When small children begin to connect a house on paper to the house they live in, they start building the connections in the brain that allow for reading and learning later.
  • Art Vocabulary:
    • Negative space: The space around and between the parts of an image.
    • Resist: an art technique that uses layers of different materials to make a design in negative space.
    • Wax: The material crayons are made of, water and wax do not mix because wax is made from oil.

Shamrock Oobleck: Discovery at Home

Materials Needed:

  • Cornstarch
  • Water
  • Green sprinkles or food coloring

Directions:

  • Put ½ cup of cornstarch and ½ cup of water in a bowl.
  • Mix together the two materials with a spoon or your hand for extra sensory play!
  • add more cornstarch or water to get desired consistency.
  • Add in your green coloring, sprinkles or other add-ins.
  • Explore! Hold it in your hand, try to mold it into a ball, slap it while it's in a bowl.

How to Expand it

  • What happens when you tap the mixture with force? Do you get any oobleck on you? What happens when you try to pick up the oobleck and hold it?
  • What happens when you add different textures to the non-newtonian fluid?
  • What happens if you use cookie cutters with oobleck? Will the shape hold? Is there a way you can make the shape stay the same as the cookie cutter?
  • For a larger scale experiment, make a bucket of oobleck and try to stand in it! Will you sink if you stand still? What happens when you jump?

What do kids learn?

  • They learn opposite words like gooey and solid, warm and cold, big and small, empty and full.
  • They touch, squeeze, smell and feel, helping build connections in the brain.
  • They see chemical reactions in action, teaching cause and effect.
  • They practice using the small muscles in their hands (fine motor skills) later used for writing.
  • They measure ingredients, demonstrating volume and encouraging comparisons.
  • They experiment! When kids experiment, they're learning how to learn.
  • Science vocabulary
    • Non-Newtonian Fluid: Something that acts like both a liquid and a solid. This is a material that does not follow Newton’s Law of Viscosity, it does not maintain the same fluidity regardless of force.
    • Force: energy caused by a push or a pull, in this case, the push or pull given to the oobleck by your hand or a tool.


Tallest Tower Competition: Discovery at Home

Materials Needed:

  • 10 - 20 Plastic Cups (multiple sizes if possible)
  • Tape measure

Directions:

  • Build the tallest tower possible using only the plastic cups. Make sure it stands for at least 15 seconds!
  • Measure the height and record the number.
  • Start over and build another tower in a different way, trying to make the tower taller.

How to expand it:

  • Add different materials to the challenge. For example, clothes pins, popsicle sticks, silverware, toys, etc. Can you balance a spoon op top of your tower? Can you drape a blanket over it?
  • Try to build your towers on a different floor, move from carpet to hardwood, to tile. Observe the differences!
  • Knock it down! Build a tower as tall as you can, then make a game out of knocking it over.

What do kids learn?

  • Hand eye coordination and fine motor skills, both useful developmental skills for learning, writing, and creating!
  • Basic engineering skills. Engineers solve problems with constraints, in this case, the limited number of cups. The learn to solve problems by using the engineering design process: asking questions, coming up with solutions, building, testing and improving.
  • Math skills. Small children learn about geometric shapes, volume, and mass by feeling three dimensional shapes in their hands and seeing how the shapes interact together. Building a tower and talking about it is a great way to build a foundation for math.
  • Patience and self control. Making the tower taller instead of knocking it over is hard for small children. This is a great test of patience, but knocking it over helps them learn, too!
  • Science vocabulary:
    • Foundation: the bottom, the support on which a structure rests.
    • Center of Mass: the place where most of the weight of an object is concentrated. In a tower, that's the base. Even little kids know the best way to knock over a tower is to go for the bottom! That's using center of mass to solve a problem.
    • Constraints: a limitation or restriction. Real engineers have to work around constraints all the time!


Wash Your Hands, Shark!

Wash Your Hands, Shark!

The Discovery Center team has our very own pro-handwashing version of everyone's favorite shark song! Learn more about how to encourage healthy handwashing at https://www.cdc.gov/handwashing/


Health Resources for Your Family

Curious Catapults: Discovery at Home

Materials Needed:

  • Spatula
  • Spoons (large and small)
  • Tape
  • Recycled lids
  • Small, soft toys

Directions:

  • Place your item on the spoon handle and push the opposite end to create a catapult.
  • Make the small item land in a cup by launching it with the spoon or launching tool.
  • Keep the spoon and cup in the same position and only adjust how hard you launch the item and the angle of the spoon setup.
  • Try out different tests to see how much force is needed for different distances.

How to expand it:

  • Keep track of the data (write what happens) for each trial and analyze it. Did it take more force to reach the cup when there was more distance between the cup and spoon? Did you have to adjust the angle when prepping for the launch?
  • Use a different item that is a little heavier or lighter to launch. What did you have to do differently? How did the data change?

What do kids learn?

  • Cause and effect: launching your object makes it move through the air. The angle and force you use changes where the object lands.
  • When building, kids practice using the small muscles in their hands (fine motor skills) later used for writing.
  • Science vocabulary:
    • Force: energy caused by a push or a pull, in this case, the push given to the spoon by your hand and the object from the spoon
    • Push: when force moves an object away from something
    • Pull: when force moves an object towards something


Curious Catapults: Pumpkin Spice Edition

Our Recipe for Slime: Discovery at Home

Our Slime Recipe!

Slime: the gift that keeps on giving! Here's the slime recipe usually used by Discovery Center educators Caitlin and Nancy, who are truly slime experts! 

  • 2 (4 oz) bottles of washable school glue
  • 1 or 2 drops liquid food coloring
  • 1 teaspoon baking soda
  • 2 to 3 tablespoons contact solution (saline solution)

Directions: Mix the food coloring and glue, then add baking soda and stir until smooth. Add 2 tablespoons of contact solution and stir until a ball starts to form. Pick up the slime and work it with your hands. Add more contact solution, if needed, to get to your desired level of sliminess. Put your slime in a clear zipper bag for portable slime play, or for a kids who likes slime but doesn't like to feel sticky things!

Slime 123 Globox Barbara Rayman, used by CC License 4.0

Add in a few of the following ingredients and see what happens!

  • Candy
  • Glitter (pro tip: use glitter glue instead of loose glitter for less mess)
  • Sequins
  • Sprinkles
  • Confetti
  • Beads
  • Plastic toys

How do kids benefit from making slime?

  • They learn opposite words like gooey and solid, warm and cold, big and small, empty and full.
  • They touch, squeeze, smell and feel, helping build connections in the brain.
  • They see chemical reactions in action, teaching cause and effect.
  • They practice using the small muscles in their hands (fine motor skills) later used for writing.
  • They measure ingredients, demonstrating volume and encouraging comparisons.
  • They imagine! Using symbolic thinking, they can become slime chefs, greet an alien life form, or perform slime magic!

Want to learn more about slime? Check out Nine Serious Fun Slime Facts.


Spooky Science Lava Lamps: Discovery at Home

Looking for a spooky science experiment to do at home? You can make your own lava lamp at home with a few simple materials—no heat required! It’s a fun and easy way for you to learn about density and polarity. This spooky DIY project is sure to get you into the Halloween Spirit!

DIY Discovery: Spooky Science Lava Lamps!

Here’s what you need:

  • Clear jar or cup
  • Vegetable oil
  • Water
  • Red food coloring
  • Effervescent tablets (such as Alka-Seltzer)
  • Fake spider, eyeball, or any other small spooky object (optional)
  • Newspaper or trash bag to cover work area in case of spills (optional)

Directions:

  1. Pour 3 parts oil into your container.
  2. Pour 1 part water into your container and watch the water settle to the bottom.
  3. Pour 10-20 drops of food coloring into your container and watch them sink. The amount of drops you use will affect the saturation of the color. You can use as much or a little food coloring as desired-it will look cool either way!
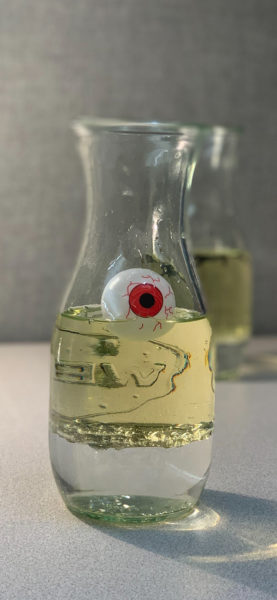
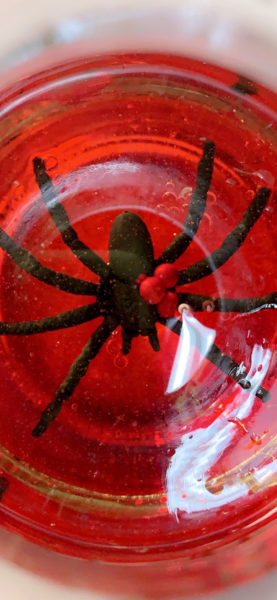
  4. If you’re using a spooky object, place it in your container now.
  5. Form your hypothesis, make a prediction--what do you think will happen when you add the effervescent tablet?
  6. Place your effervescent tablet in your container.
  7. Wait a few minutes and then repeat step 6 as many times as you’d like!

What did you observe? Was the reaction similar to your hypothesis?

Here are the answers to some questions you might have after doing this experiment:

Q: Why does the water sink to the bottom of the container and why does the oil float on top of the water?
A: Density is the way we measure how much something weighs compared to its size. If an item is small and heavy, it has a high density. If it is large and light, it has a low density. If two items take up the same amount of space, but one weighs more than the other, the heavier item is more dense than the lighter item.

In our experiment, we added water and oil to a container. Water is heavier than oil, so it is more dense. Oil is less dense than water because oil weighs less than water.

Oil and water have different densities, so when added to the same container, the oil floats in a layer on top of the water. However, density isn’t the only reason they don’t mix. Another important factor is polarity.

Water is what is known as a polar liquid. Water easily attracts and combines with other polar objects. Oil, however, is non-polar. Therefore, oil and water do not mix.

Q: Why did the food coloring dye the water but not the oil?
A: Food coloring is more dense than oil, so the food coloring moves through the oil and down into the water. Because food coloring is water-based, it has the same density as water, and mixes with the water at the bottom of the container. The polarity of water also causes it to attract the food coloring, therefore the two easily mix together.

Q: Why did my spooky object sink/float?
A: If your object sank all the way to the bottom of the container, it is more dense than the water and the oil. If your object floated on the top of the oil, it is less dense than the water and the oil. If your object sank to the bottom of the oil but floated on top of the water, it is more dense than the oil but less dense than the water.

Q: Why did the effervescent tablet cause the water to rise into the oil?
A: The effervescent tablet is an example of a chemical reaction. The tablet contains sodium bicarbonate, commonly known as baking soda. Another ingredient is citric acid, which is partially made up of hydrogen.

When the tablet is added to water, the baking soda is separated into sodium and bicarbonate. Now that the bicarbonate is split from the sodium, the bicarbonate reacts with the hydrogen in the citric acid, forming carbon dioxide.

The carbon dioxide is a product of the chemical reaction, and it causes the tablet to fizz and bubble. These carbon dioxide gas bubbles are less dense than oil and water, so they float to the top of the container.

Q: Why does the water separate from the oil again after the reaction?
A: When the carbon dioxide gas bubbles rise to the top of the container during the chemical reaction, they take some water up with them. When the bubbles reach the surface, they pop and are released into the air.

This is also what happens when you shake a bottle of soda. Carbon dioxide gas rises to the top of the soda bottle because the gas bubbles are less dense than the soda. Then when you open the bottle and release the pressure, the gas bubbles contact the air and are released.

We know that water is more dense than oil, so once the chemical reaction is over, the water will separate from the oil, sinking back down to the bottom of the container.

You can also use different methods for this experiment. Here are some other ideas for you to try:

  • Break up the effervescent tablet into smaller pieces instead of dropping it into the jar in one big piece. Is the reaction smaller, bigger, or the same?
  • Use more than one effervescent tablet. How is the reaction different?
  • Use a water bottle instead of a jar or cup. You can shake or swirl the bottle and then you don’t need the effervescent tablet.
  • Add another liquid to test its density. For example, you could use baby oil, honey, or dish soap. You could even use all of these liquids and build a density tower!
  • Use other kinds of food coloring to make colorful DIY lava lamps.
  • Try to predict how long it will take the water to settle back down to the bottom of the container and then time it to see if you were close.
  • Try placing an ice cube in the container. Does it sink or float? Try crushed ice. You can watch it melt!

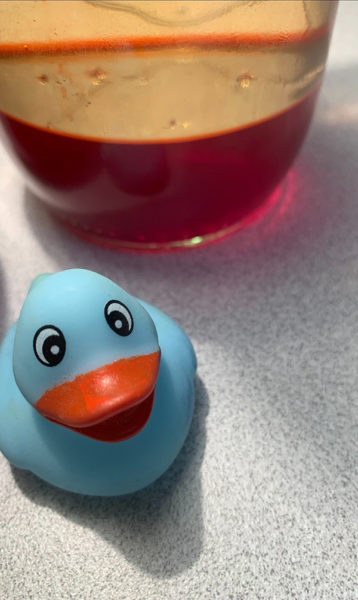
Drop other objects into the container to see if they sink or float. Here are some ideas for objects for you to test:

  • Coins
  • Buttons
  • Rubber ducks
  • Grapes
  • Cherry Tomatoes
  • Paperclips
  • Rocks
  • Legos
  • Clothespins


Crystal Creations: Discovery at Home

It is officially spooky season! We’ve got a fun and easy way for you to create some cool crystal creations! You can decorate your home, or give your creations to your friends and family as cool spooky-themed gifts.

Crystal Creations Time Lapse!

Here’s what you need:

  • Clear jar or cup
  • Pipe cleaners
  • Borax
  • Hot water
  • Pen or pencil
  • Fishing line, wire, or string

Directions:

  1. Make your spooky-themed item out of pipe cleaners. Show your creative side! What can you make?
  2. Boil water. Tip: heat water on the stove or with an electric tea kettle. Adult supervision required! Do not use a microwave to heat water.
  3. Mix 1 part borax into 4 parts water. Tip: Stir the borax until it dissolves completely.
  4. Let the mixture cool for a few minutes.
  5. While your mixture is cooling, tie your creation to a pencil and place the pencil across the top of your container, letting your creation dangle inside the container. Tip: make sure your creation doesn’t touch the bottom or sides of your container. You may have to adjust your string.
  6. Clear crystals will start to form on your creation. This process takes 5-8 hours, so be patient and check on the awesome progress as often as desired.
  7. Once you’re satisfied with the crystals that have formed, remove your crystal creation from the container and remove the string.

Here are the answers to some questions you might have after doing this experiment:

Q: Why did we use borax?
Borax, or sodium borate, is extremely versatile and is used in numerous products, including cosmetics, laundry detergent, enamel glazes, fiberglass, and insecticide. It is also used for crafts and science experiments like this one!

Powdered borax is made up of tiny soft crystals. Powdered borax is partially soluble, meaning it dissolves in water. Borax is more soluble in hot water than in cold water, which is why we mixed the borax with boiling water.

Q: What caused the crystals to form?
When the borax is mixed into the boiling water, it dissolves. However, as the water begins to cool, the borax becomes less soluble, causing it to separate from the water.

When the borax separates from the water, it moves around looking for a boundary, or a place to land. When it finds a boundary, it accumulates as the water cools. This accumulation continues over time.

In our experiment, the boundary is the pipe cleaner. You also might have noticed that the container accumulated some crystals as well. The container is another boundary in our experiment. This is why it was important that the pipe cleaner wasn’t touching the container.

As the dissolved soft crystals continue to move toward a boundary, they form larger hard crystals on the pipe cleaner. The accumulation of the borax on the boundaries is an example of a process called sedimentation.

Q: Why does the process take several hours?
The sedimentation process occurs due to the continued accumulation of the borax onto the pipe cleaners, so the crystals continue to grow more and more layers. Leaving your creation in the mixture for only a short time would only allow a portion of the borax to accumulate on the pipe cleaner.

Q: Why didn’t the crystals need dye?
The crystals are opaque, so you can use any color pipe cleaner to be creative and make whatever you can imagine. Keep it simple-no dye required!

The first time we did this, it didn't work! It's true. Check out the picture above for our wet, but not crystal-covered spider. 

It's okay! Failure is an important part of the scientific process! The first time we tried the experiment, crystals did not form. If your crystals don’t form, you may need to troubleshoot. There were a few key mistakes that we made sure to correct on our next attempt.

  • When we first attempted the experiment, we microwaved the water instead of boiling it. This didn’t allow the water to become hot enough without also making the container scalding hot.
  • The borax in one of our containers did not fully dissolve in the water because the temperature was too low. The water in this container had too much time to cool outside of the microwave before we added the borax. As a result, most of the borax that we poured into the container did not dissolve, and instead settled to the bottom of the container.
  • Make sure to mix in the borax immediately after the hot water is added to your container. It’s okay for a little bit of borax to settle at the bottom of your container, but if there is a large amount of borax that settles, the water wasn’t warm enough.
  • The water in our second container was warm enough to dissolve the borax, but no crystals formed because not enough borax was used. The ratio of borax to water used on our first attempt was 1:6. We adjusted the ratio of borax to water to 1:4 for our second attempt.
  • If your crystals don’t form, try adding more borax, making the solution more saturated. A more saturated solution gives the opportunity for more crystals to form, but you don’t want to add so much borax that it won’t dissolve in the hot water.
  • You can also try using distilled water if you want your crystals to look more clear and less opaque.

We made a spider and a pumpkin. What other spooky-themed creatures can you create? Here are some more ideas:

  • Bat
  • Ghost
  • Cat
  • Spider web
  • Witch hat
  • Vampire teeth

Have fun showing off your cool crystal creations! These homemade decorations are sure to make any space look spook-tacular!

Discovery DIY: STEAM Fun with Paper Towel Tubes! 

Discovery DIY: STEAM Fun with Paper Towel Tubes! 

What do you do with your empty paper towel and toilet paper tubes? Don’t throw them out, upcycle them! We’ve got five ways for you to create, learn, and have some serious fun! 

Science Paper Towel Tube Indoor Herb Planters


Paper towel roll planters are a cheap and easy way to grow small plants and herbs without having to buy flower pots or planting tools. You can grow things for your kitchen such as mint, rosemary, basil, oregano, parsley, thyme, and sage. You can also start other plants such as cherry tomatoes and then transplant them outside as they grow! 

Here’s what you need:

  • Paper towel, toilet paper, or wrapping paper tubes
  • Scissors
  • Reusable washable plastic container (clear would be best, but any container will work)
  • Soil
  • Seeds
  • Ledge near a window 

Directions:

  1. Cut tubes slightly shorter than the height of your container.
  2. Fill tubes almost to the top with soil.
  3. Place seeds into soil.
  4. Place container on a ledge or table near a window so that they get plenty of sunlight.
  5. Don’t forget to water the plants as needed! 

Technology Paper Towel Tube Phone Speaker


This paper towel tube phone speaker is a great way to amplify sound if your phone speaker needs a bit of a boost. No need to go out and buy expensive bluetooth speakers. This is great for listening to music while playing outside, cooking together in the kitchen, or hanging out in the living room. You can also make the slot bigger for a tablet! 

Here’s what you need:

  • 3 Paper towel, toilet paper, or wrapping paper tubes
  • Scissors
  • A pen or marker
  • Phone or tablet 

Directions:

  1. Cut a slot the size of your phone or tablet in the middle of the first tube.
  2. Trace a circle the size of a tube opening on one side of the other tubes.
  3. Poke a hole in the middle of your circles and cut toward the outside of the circle in several places. Tip: It’s ok to cut past the circle because the circles can be a bit bigger than the tube so that they will easily fit together.
  4. Push to fold the triangles in toward the inside of the tubes. 

Place the tube with the phone slot inside the circles of the other two tubes. Place your phone or tablet in the slot and dance to your favorite tunes! 

Engineering Paper Towel Tube Scale


This activity is great for learning about balance and weight. You can use different sized items to show how a heavier item may balance with multiple lighter items. 

Here’s what you need:

  • 3 Paper towel, toilet paper, or wrapping paper tubes
  • A disposable straw to hold the tubes together
  • String
  • Scissors
  • Duct tape
  • Ruler (optional)
  • Buttons, coins, washers, or other small items that vary in weight and size 

Directions:

  1. Poke a hole in each of the two vertical tubes about a half inch from the top.
  2. Poke a hole on each side of the horizontal tube as close to the middle as possible.
  3. Cut a straw to the width of the three tubes (see example below). 
  4. Place the straw through the holes to attach the three tubes. Tip: you can tape the straw to the inside of the vertical tubes if the holes are a bit too big or if the straw is a bit too short.
  5. Cut a piece of string about double the length of a tube. Place the string through the horizontal tube so that string hangs out on either side.

How to make the baskets: To make each basket, you will need 10 squares of duct tape and 10 strips of duct tape. 

  1. Stick two squares together sticky sides toward each other. Do this five times to make each side and also the bottom of the basket.
  2. Secure the sides to each other by using a strip on each corner. Secure the bottom by sticking 4 strips to each side of the bottom and then securing it to the walls.
  3. Use the remaining two strips to make the handle. Tape or tie the handle to the hanging string.
  4. You can also use disposable sauce containers or small paper cups (1-2 oz). If using sauce containers or paper cups, you can make the handles out of tape or string and attach the baskets to the hanging string by tying or taping. 

Now your scale is complete! It’s time to place items such as buttons or coins in each basket to see how many items it takes to get the scale to balance! This can also be a counting exercise or a fun guessing game. How many small buttons will balance with 8 bigger buttons? How many washers will balance with 10 pennies? How many dimes will balance with a rock? 

Art Paper Towel Tube Kaleidoscope


This upcycled kaleidoscope is a fun way to be creative and to appreciate the beauty of your awesome designs! 

Here’s what you need:

  • Paper towel tube or toilet paper tube
  • Bendy straw
  • White paper
  • Scissors
  • Glue stick (if tube is brown)
  • Markers, paint, crayons, colored pencils, or stickers
  • Shiny/metallic duct tape or aluminum foil 

Directions:

  1. Cut tube to desired length. You can use a toilet paper tube or you can cut a paper towel tube in half or thirds.
  2. Stick your metallic duct tape to the inside of the tube. Cover as much of the inside of the tube as possible, but it doesn’t have to be perfect because it will still shine! If using foil instead of shiny duct tape, cut foil to the length of the tube and fold into a triangle. Tip: fold the shiny side of the foil toward the inside of the triangle and the dull side on the outside of the triangle for extra brightness!
  3. If the tube is already white, have fun drawing, doodling, painting, or using stickers to personalize your kaleidoscope. If tube is brown, cut white paper to the appropriate size to wrap around the tube and then use a glue stick to glue the paper to the tube. Now you can draw, paint, and create!
  4. Cut two slits (about a straw’s width apart) near one end of the tube. Trace a circle on white paper. Tip: if you used duct tape, you can use the tape roll to trace the circle.
  5. Cut out the circle and make some colorful art on one or both sides.
  6. Cut a hole in the middle of the circle and place the straw through the hole.
  7. Place the straw through the slits you made on the tube.
  8. Turn the straw to see different parts of your creation, and let it shine! 


Math Paper Towel Tube Counting & Math Maze


Count, add, subtract, and multiply with this fun maze! Make your way through the numbers in order or make your own math! Did the ball roll through 6 and then 3? Add them up and try to roll through the correct answer next. Or start at 9 and roll through the numbers backwards! 

Here’s what you need:

  • A cardboard box or plastic tray with an outer edge on all 4 sides
  • Paper towel tubes or toilet paper tubes
  • Marker
  • Tape
  • A ball or object that rolls easily
  • Scissors 

Directions:

  1. Cut the sides of your cardboard box to the desired height if necessary. Tip: Pizza box lids would work great if they’re clean, just tape the corners.
  2. Cut tubes into smaller sections. You will need 9 total.
  3. Write numbers 1-9 on the tubes. Tip: underline 6 and 9.
  4. Arrange the numbered tube sections in a random order and position and tape them to the base of the cardboard box.
  5. Roll the ball through the maze to make sure it fits between spaces. 

Have lots of serious fun with your math maze and all of your paper towel tube creations! 

---

So many tubes but so little time? Don’t worry, you can always donate your toilet paper and paper towel tubes to your local zoo! Big cats and other carnivores love searching for treats inside cardboard tubes, and birds use cardboard tubes for perching and play. Animal care experts love being able to provide this type of enrichment for animals.